Tap tap tap

When you change-up your keyboard layout, or shape, you'll notice your typing accuracy and speed takes a nosedive. Thankfully it bounces back pretty quickly. After using the Dactyl Manuform for so long, I believe I can say without a doubt that it has improved both of these things. The shape of the wells for the switches means my fingers have to move less than ever before with standard keyboards, and not having a physical mouse means my hands can stay in one position for the duration of my work.

Check it out.

/images/wpm_09-06-20.thumb.png

Ok, so it's not earth-shattering, or record-breaking, but it's not too shabby either and certainly an improvement for me.

Show Your Work

With a lack of build guide for this print I used a mixture of my limited knowledge of circuitry, logic, and previous experience to get this guy wired. I always make sure to test connections every step of the way, it's so much easier than fixing problems after the fact.

Yet, lo and behold! After flashing the pro micro successfully, and then connecting the microprocessors to the keyboard, I was a bit surprised that it wasn't working.

Like.

At all.

This isn't my first rodeo, so I didn't expect anything to be perfect the first go around but it took some tinkering and digging to figure out that the pro-micro pins were slightly different from the pins used in the dactyl files on qmk.

This isn't a big problem, you just need to make sure the pins listed in the config.h file correspond to your wiring.

Here's some progress shots.

And... some resources that helped me out:

https://golem.hu/pic/pro_micro_pinout.jpg

https://keyboardchecker.com/

https://docs.qmk.fm/#/config_options

If you get stuck, there's a lot of information on the QMK site.

Long time no build

From the "not so hot-off-the-press" files comes a build that's been on my to-do list since February. I was asked to have a go at the Dactyl EZ-to-Print... turns out it wasn't that easy to actually print. I had some difficulties with sagging and getting thex openings for the switches to stay crisp but in the end, I made it work.

Art!

With all the parts ready to go I started following the assembly on the repo for the case, but it looks you're meant to put the back on before wiring, just to hold it together... soooooo I went rogue and did my own thing.

3D Printed Components to build the Left half of the keyboard

Stay tuned for progress.

When your boss, who is also the CEO, asks for your help building a surprise dactyl...

Woooaaah nelly! These Dactyl boards sure are popular!

Spoiler Alert: That's because they're great!

I post a lot projects that I'm tinkering with on my instagram account and my boss reached out to me to ask about comissioning a custom Dactyl Manuform as a surprise for his wife! WHEE! Of course I was totally up for it!

I really, really, love building mechanical keyboards but I already have 4. Considering I only have one desk and one set of hands, there's no way I need more (Said no member of r/mechanicalkeyboards, ever.). If I can build keyboards for other people, then I get the joy of building them and none of the hassle of choosing a favourite among my keyboard babies. Err, forget I said that. That's not to say I'm open to doing comissions for just anyone, they do take up a considerable amount of my time. I already have too many hobbies to squeeze into what little free time I do have.

After going over some options, we decided to keep the board relatively quiet and went with linear switches (Cherry MX Red) for the alpha keys, and Tactile switches (Cherry Brown) for the modifiers. This gives some more feedback when typing and learning to type on the dactyl. We also decided, since he liked the gradient of my Iris keycaps, to get the keycaps printed from WASD Keyboards. I've used them before and their customer service is outstanding, the prices are very reasonable and they're lightening quick with production. The bonus with designing your own keycaps is that you can change the labels to suit your layout.

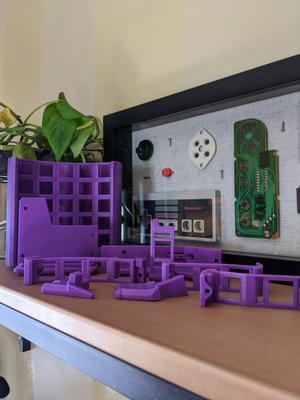
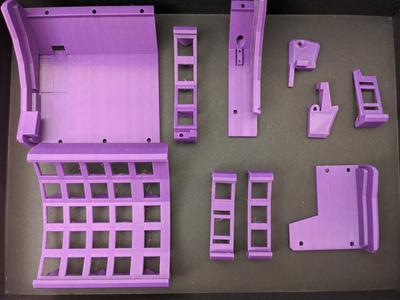
Again, this was printed on the Prusa is MK3 with black PLA filament which really needs no finishing. I find that's the biggest bonus of upgrading my printer. All that's left to do after printing is ripping out the supports, which is kind of the best part!

So after waiting for the rest of the supplies to arrive (RJ9 Cables and Connectors, and some more Microcontrollers) it was finally time to assemble.

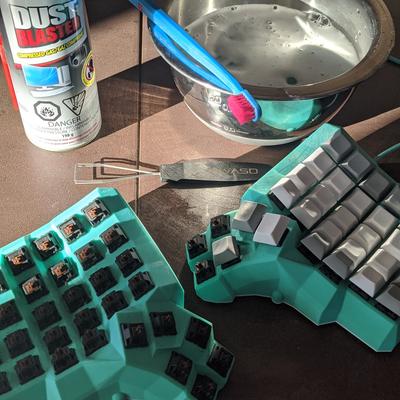
Here's the finished board, I think it's really sharp! (I know, I know I'm biased. What's your point?)

View post on imgur.com

I'm getting quicker at handwiring these bad boys, though it's generally not a quick biuld. Even with practice the shape makes the corners awkward so, it still takes a good 5-8 hours of tinkering.

Dactyl Build - Completed 03-May-2019

Worth it.

I'm going to need to take a break for a while, although I still have some pro micros, switches, cables and connectors on hand.... you know, just in case.

When your bestie requests a dactyl that's 'Purple and Loud AF' this is the end result...

This has been a collaborative work-in-progress for the better part of two months. Collaborative in that Dana was the designer and I was the builder.

So my bestie, Dana, wanted a Dactyl that was purple and loud. Easy. We both scoured Aliexpress and put together a list of keycaps that would work for ortholinear keyboards (it's hard to find sets that are 1-u so you need to be creative with the available caps in a stock set.) and I got all the other components ordered and this is the final result:

Purple Gradient Dactyl Manuform 5x6

Not the best pictures, but you get the idea.

I couldn't wait to share with r/mechanicalkeyboards and... well now I have a whole lot of people wanting to be my best friend. Hah, joke's on them. There's no room at the inn.

BOOM! One Week of using the dactyl manuform

After a solid week of using the Dactyl Manuform exclusively at work my typing is just about back to where it was before:

79 Words Per Minute

I should mention that I also use a mouse layer on this board and haven't used a physical mouse since September, so my hands are literally on the keyboard the entire time I'm at my desk. It's been pretty convenient and comfortable.

I've already received two requests to build more of these for friends/coworkers so I'll add pics/info when I get into that.

Sweet, Sweet pictures of the Dactyl Manuform

Getting better!

Not too shabby. Typing on the manuform has been much easier than I expected, the height is a source of mild discomfort so I will get myself a taller wrist support or print the matching ones to go with the dactyl.

My friend Jordan takes fantastic pictures so I asked him to help me grab some cool shots in the alley beside our office. Here's what he came up with:

Completed Dactyl Manuform (5x6)

Pretty great, right?

I'm pretty darn pleased with this board.

Hand Wiring Adventures: Part 4

Holy moly it's been a while and I've been staring at this keyboard every day wanting it to be done already!

Turns out, the body has cutouts for RJ9 connectors on the back, and even though I thought I was ahead of the game by ordering extra TRRS cables and jacks months ago, they left a big gap in the back of the case and that bothered me. I can be quite particular when the mood strikes so I waited (... and waited...) for RJ9 connectors to arrive from China.

Once the right parts arrived I was ready to finish this badboy! The schematic had 3 wires, and the jacks had 4... so I figured, "a wire is just a wire*, right?", and snipped one off. Then I proceeded to solder both halves the exact same way and flash the micro controllers.

TADA!

  • Except when it's a wire that you need.

Much to my dismay, I discovered a bit too late that my RJ9 cable was a crossover cable and soldering both halves the exact same way meant that they weren't the same at all. So I had to desolder, replace one of the jacks and put it back together. But thankfully that was an easy solution and was quickly sorted.

I did my best to keep the wires neat and insulate whenever possible to avoid shorts but I wasn't happy with having an open bottom on the board. I was going to mock-up my own to print, but I was pleased to find that there are now STLS in the Dactyl repo for the bottom plates! Yahoo!

ALL DONE, FINALLY! Woo!